
Renaming your fanpage is a common need when you want to rebrand, shift your business direction, or optimize your fanpage name for SEO and advertising. However, not everyone knows the correct and straightforward way to get Facebook's approval quickly. In this article, Like3s will walk you through how to rename your fanpage step by step, along with important notes to help you avoid having your request rejected.
See also: How to attract more followers to your personal Facebook profile
Basic requirements for renaming your fanpage
Before learning how to rename your fanpage, you need to be aware of the following basic requirements:
Admin rights: Only admins can submit a fanpage name change request.
Facebook's policies: The new name must be related to the current name, must not contain special characters such as +, -, ?, and must not infringe on any copyrights (e.g., artist names, zodiac sign names). In particular, fanpages with more than 5 million likes cannot be renamed.
Waiting period: If you were recently added as an admin, you will need to wait a few days before you can submit a name change request.
How to rename your fanpage on a computer — easy to follow
Here are the steps to do it simply:
Step 1: Go to the fanpage you want to rename.

Step 2: Click on Edit Page info in the left column of the screen, then enter the new name you want to use.
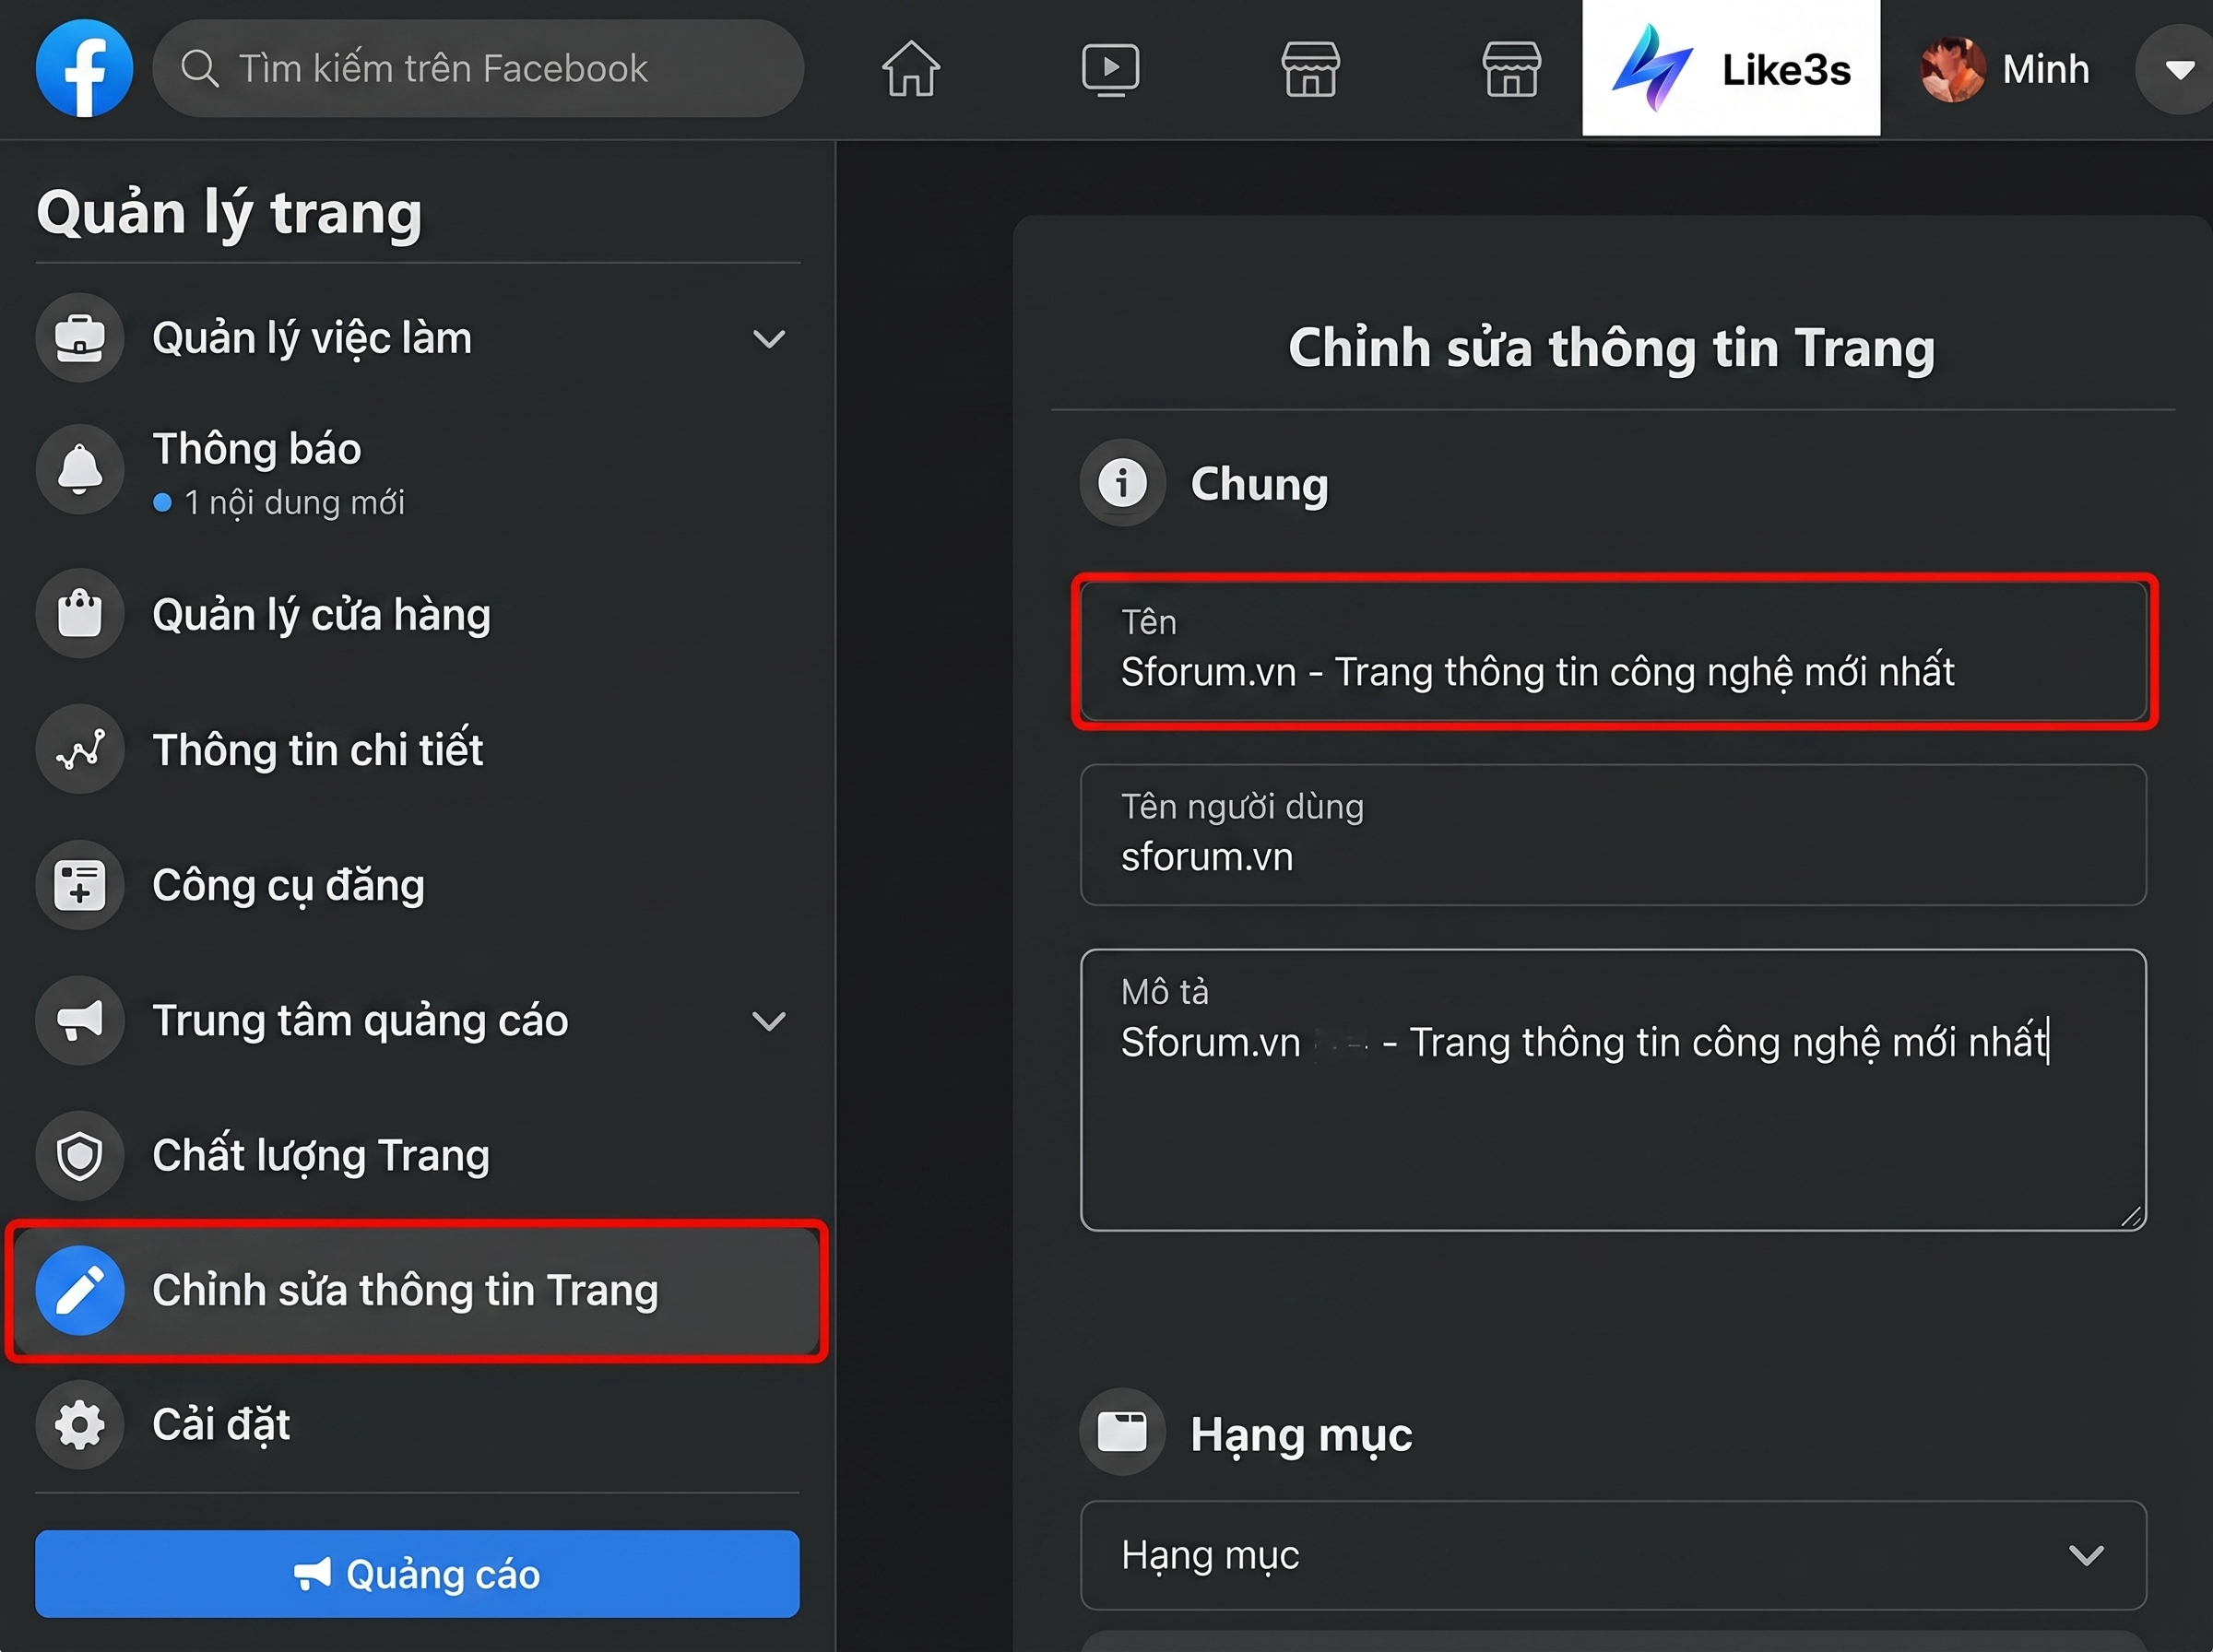
Step 3: Once you have entered the new name, click to confirm the change request to complete the fanpage renaming process.

How to rename your fanpage on a mobile device — easy to follow
Step 1: Open the Facebook app, then tap Pages in the Menu (3 horizontal lines) > Then select the Fanpage you want to rename.
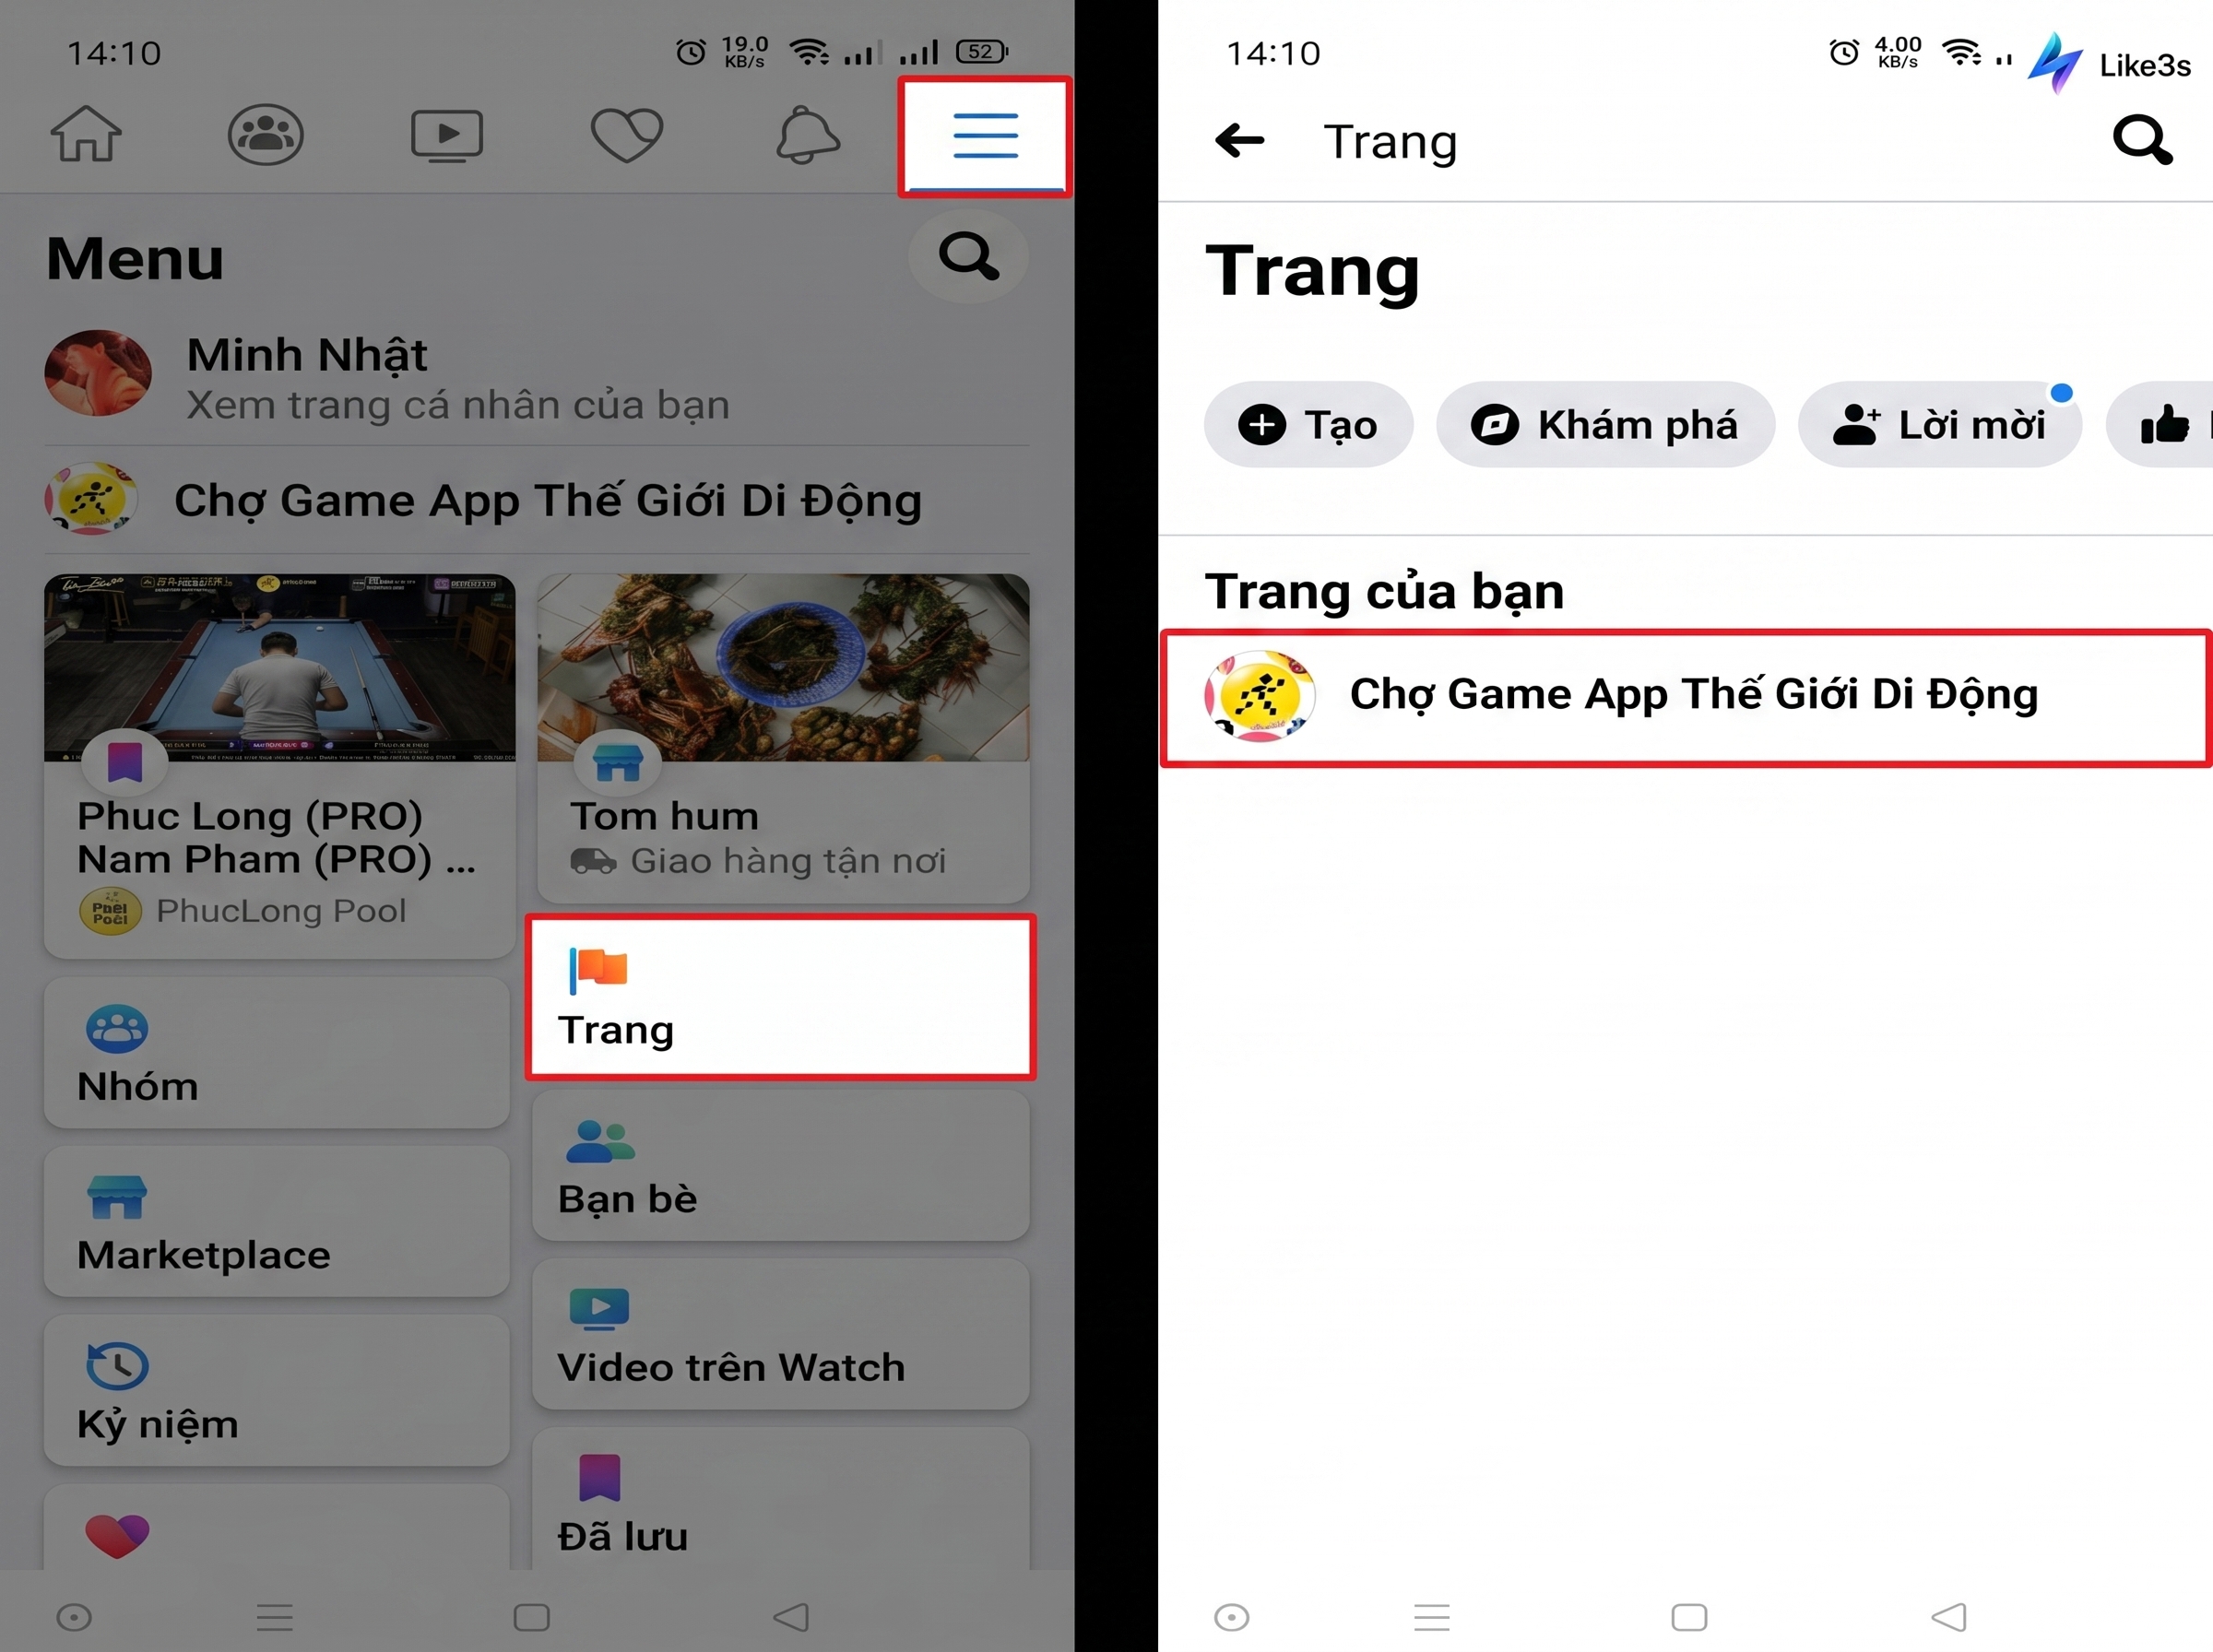
Step 2: Once you are on the Fanpage you want to rename, tap Edit Page and then select Page info.

Step 3: Enter the new name you want to use.

See also:
The Like3s content team — sharing algorithm insights, case studies and channel-building strategy.