How to register for a blue checkmark on your Facebook account is a topic many people are interested in when looking to boost credibility and verify their identity on the platform. However, not everyone is familiar with the requirements and registration process under Meta's latest policies. In the article below, Like3s will provide a detailed guide on how to register for a Facebook blue checkmark in 2026.

See more: Tips to Help Your Facebook Page Grow Consistently Every Day
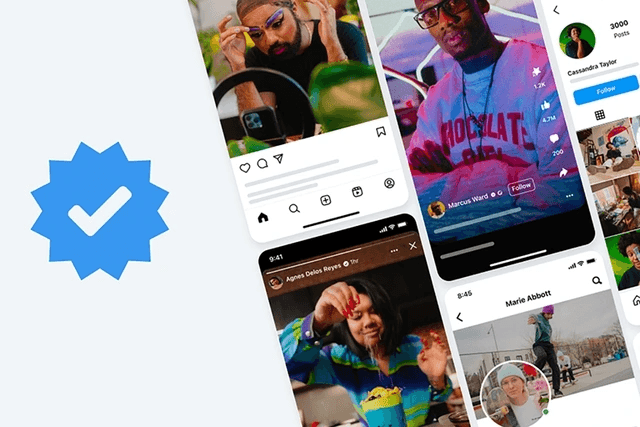
Types of Facebook Blue Checkmarks

Meta Verified (Paid Blue Checkmark)
Meta Verified is currently the most popular verification option for individual users, content creators, and small businesses. When registering for this blue checkmark, users receive a verified identity badge on Facebook and may extend it to other platforms within the Meta ecosystem if they meet the account-linking requirements. The cost is typically:
$11.99/month when subscribing on the web.
$14.99/month when subscribing on mobile.
Notability Verification Blue Checkmark
This is the traditional verification method Facebook applies to individuals, brands, or organizations with significant influence in the community. Unlike Meta Verified, this type of blue checkmark does not require a fee, but the account must meet the criteria for "notability."
Facebook considers multiple factors when evaluating notability, including coverage by reputable news outlets, credible public information sources, and the level of public interest. Additionally, the account must demonstrate authenticity, represent a real individual or organization, and maintain a transparent activity history on the platform.
Requirements for Registering a Facebook Blue Checkmark
For Personal Facebook Accounts
The Facebook account must provide complete basic information.
The account holder must prepare a government-issued ID: intact, with no missing corners, no signs of alteration, and clearly legible.
Must not violate Facebook's community policies.
The account should have a large following and maintain frequent activity.
Must have a certain level of fame and credibility.
For Business Fanpages
Business registration certificate.
Business tax documents.
An actual following of over 10,000.
Must be categorized as a Local Business and have complete contact information listed.
Must not violate Facebook's community policies.
How to Register for a Blue Checkmark on Your Facebook Account
How to Register for a Facebook Blue Checkmark for a Fanpage
Step 1: Access Facebook's Verification Form
Meta provides a verification request form for Pages and organizations. In the verification section, select the account type as Page.
Step 2: Select the Fanpage to Verify
Choose the Fanpage you want to register for the blue checkmark from the list of Pages you currently manage.
Step 3: Upload Business Documents
Upload documents that prove the legal status of your business and brand.
Note:
The information on the documents must match the business name.
Photos must be clear and unaltered.
Step 4: Select Your Field of Activity
Fill in:
Industry category.
Country of operation.
A brief description of the brand.
Step 5: Add Links Demonstrating Notability
You should attach:
Official website.
YouTube channel.
Your own TikTok or Instagram account.
Meta uses these sources to evaluate the credibility and notability of your brand.
Step 6: Submit the Review Request
Once your application is complete, click Submit and wait for Meta's response.
The review period typically ranges from a few days to a few weeks depending on each application.
How to Register for a Personal Facebook Blue Checkmark
Step 1: Access the Accounts Center
Facebook Account → Settings & Privacy → Settings → Accounts Center
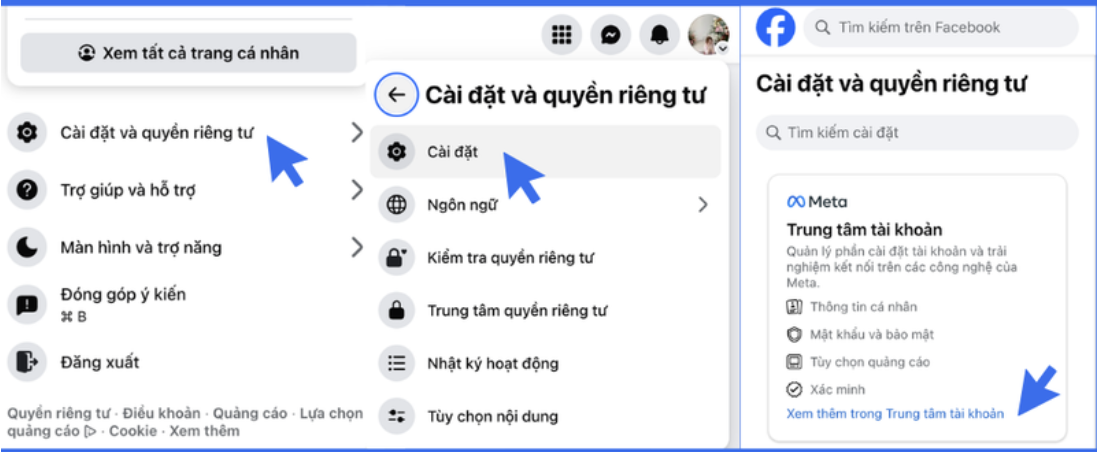
Then scroll down to the Meta Verified section.
Step 2: Select Sign Up for Meta Verified
Tap Sign up for Meta Verified.
If you don't see this option yet, try the following:
Update to the latest version of the Facebook app.
Enable two-factor authentication.
Wait for Meta to roll out the feature to your account.
Step 3: Verify Your Identity
Upload:
Front of your national ID card.
Back of your national ID card or equivalent documents such as a driver's license, marriage certificate, etc.
Photos must be clearly legible and unaltered.
Step 4: Pay the Meta Verified Fee
Meta will request a monthly payment once you have completed the verification application.
Step 5: Wait for Review
The review period typically ranges from a few minutes to a few days depending on each account.
Common Reasons Fanpages Are Rejected for Blue Checkmark Registration
Missing business documents.
Newly created Fanpage with little activity.
Unable to demonstrate brand recognition.
Inconsistent business information across platforms.
Use of unnatural followers or engagement.
Conclusion
Understanding the blue checkmark registration process on Facebook will help individuals and businesses better prepare their applications, meet Meta's verification requirements, and increase their chances of successful approval. We hope this content from Like3s gives you a clearer picture of how to register for a Facebook blue checkmark!
See more:
How to Enable Facebook Two-Factor Authentication 2026: Step-by-Step Guide for All Devices
How to Add Contact Information on Facebook Quickly and Accurately.
How to Enable Facebook Monetization 2026 – Latest Update: Requirements and Detailed Guide
The Like3s content team — sharing algorithm insights, case studies and channel-building strategy.